Many of you may not know how to install custom fonts in Blogger, especially those who manage their Blogger websites from mobile devices. This guide is for you! I will show the entire process on mobile, and if anyone finds any steps confusing, feel free to follow the screenshots. We’ll complete this in a few simple steps, so let’s get started!
Install Custom Fonts
- Theme Section: First, log in to Blogger and then navigate to the Theme option on the site where you want to add the custom font.
- Click Customise: Then, you'll see a button called Customise. Click on the arrow symbol below it. A list of options will appear. Next, click on the Backup option to back up your theme. This way, if you accidentally delete any code, you can restore your theme later without any issues.
- Install Quick Editor: Now, go to the Play Store and search for the app Quick Editor. Install it and open the app.
- Next, click on the file icon located at the bottom.
- Click on Open SAF, then select the theme where you want to add the font.
- Now, go to Google and search for font. I’ve selected SolaimanLipi because that’s the font I’ll be installing.
- Open the website named Bangla web fonts, then copy the text under the Standard section.
- Scroll down a bit and copy the SolaimanLipi text under Specify in CSS. Save this in your notes for later use.
- Now, remove Chrome Browser from the background.
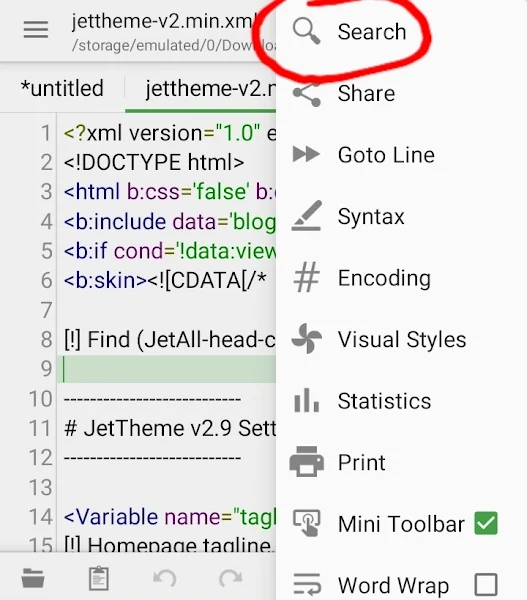
- Open the Quick Edit App, click on the three lines menu, then tap on the search icon and start searching.
- Next, go to your notes and copy the first piece of text. Paste it below the existing code in Quick Edit. (Remember, you need to use a / before the "stylesheet" tag, like this: .)
- After that, go back to the search option and search for "font-family". You'll see the names of many fonts listed there. Copy all of them and save them in your notes. Then, one by one, go back to the search option.
Paste the font names you copied into the Search Text box, and in the Replace box, put SolaimanLipi (which you got from the CSS code you copied earlier).
- Now, replace all the font names with SolaimanLipi in the same way.
- After that, copy the modified code, go to the Edit Theme option in your Blogger, delete all the existing code, and paste the code you copied. Finally, click on Save to apply the changes.


.jpg)


Post a Comment
0Comments